

How to Be an Awesome Wedding Videographer in Melbourne — A Practical Handbook
How do you become an Awesome wedding videographer in Melbourne?
Back in 2021, I co-authored a blog with Mark — a very talented and respected wedding videographer in Melbourne. The guide we created received great feedback at the time. However, several readers recently pointed out that it's now a little outdated. Since then, technology, filming techniques, and even client expectations have evolved.
Mark’s style is more traditional and academic. While his insights are valuable, the guide lacked practical case studies and real-world scenarios — something many aspiring videographers crave.
That feedback motivated me to create this updated, evolved version — a true handbook for becoming a professional wedding videographer in Melbourne.
This isn’t for hobbyists or fans of wedding films. It’s designed for those who want to make a living from wedding videography — whether you're an intermediate or an advanced shooter aiming to go full-time.
I'm Seth. I started as a junior wedding videographer at Tree Studio in 2012 and became the studio’s principal videographer in 2020. Over the years, I’ve worked on hundreds of weddings and mentored up-and-coming videographers.
In this handbook, I’ll build on Mark’s earlier guide while adding new sections, updated insights, and most importantly — real case studies from actual weddings. I’ll also introduce you to Ivan — one of my mentees. He's curious, humble, and full of questions — many of which you probably have, too. So, throughout this guide, I’ll be answering his questions as well.
Let’s not waste any time — let’s dive in and get you one step closer to becoming a professional wedding videographer in Melbourne.
Preliminary
The first day I met Ivan, this young man full of curious questions asked me, “Can I become an awesome wedding videographer in Melbourne in 3 months?”
Ivan is a smart guy. He’s passionate about researching the latest high-potential cameras, lenses, gimbals, video LED lights—you name it. He also enjoys buying and selling videography gear on Facebook Marketplace and Gumtree. When he showed me a short film (not a wedding one) on his iPad Pro—yes, he’s a die-hard Apple fan—I could sense his aesthetic instincts and some promising videography skills and concepts.
But I didn’t rush to praise him. I was cautious. I didn’t want this young man to get carried away—it wouldn’t be good for his journey as a wedding videographer. So, I replied,
“You’ve got a good sense of videography and some solid basics, but are you familiar with weddings? Have you ever filmed an entire wedding by yourself?”
Ivan looked a bit uneasy and scratched his head. “To be honest… I haven’t. But… I’ve been to my uncle’s wedding.”
“When was that?” I asked.
Ivan thought for a moment and said, “Maybe 7 or 8 years ago.”
I told him, “You went to that wedding a long time ago, and I bet you didn’t witness the full day. More importantly, your perspective was that of a guest—not a trained wedding videographer. Right? You may have technical skills, but you're missing wedding-specific knowledge. It’s like being a well-equipped soldier without battlefield survival skills. And I wouldn’t send a soldier to the front line without knowing how to survive the battlefield.”
Ivan became humble.
“You’re right. So where should I start?”
For Ivan—and anyone like him—I’ve prepared a preliminary guide. Before I teach you everything about wedding videography in Melbourne, I want you to self-learn these essentials:
- Complete Wedding Day Guide – This guide covers the full wedding itinerary. It’s your foundation. It will help you build a system for what to film throughout the wedding day.
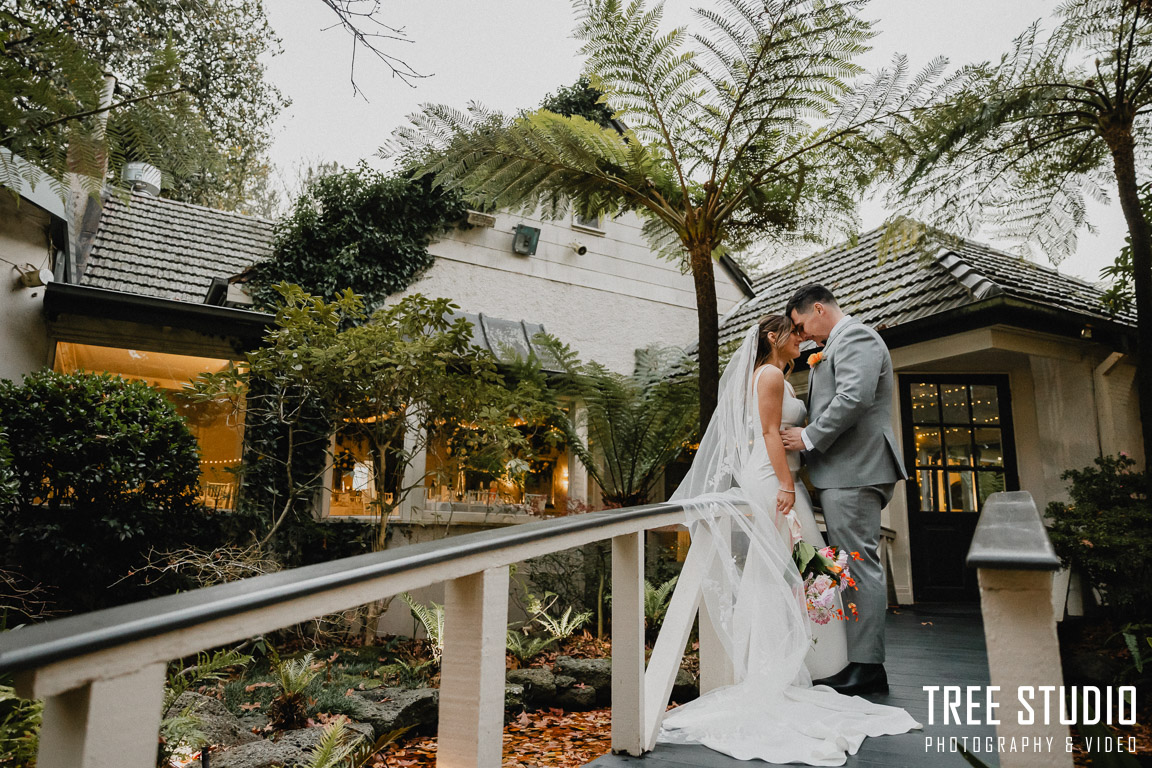
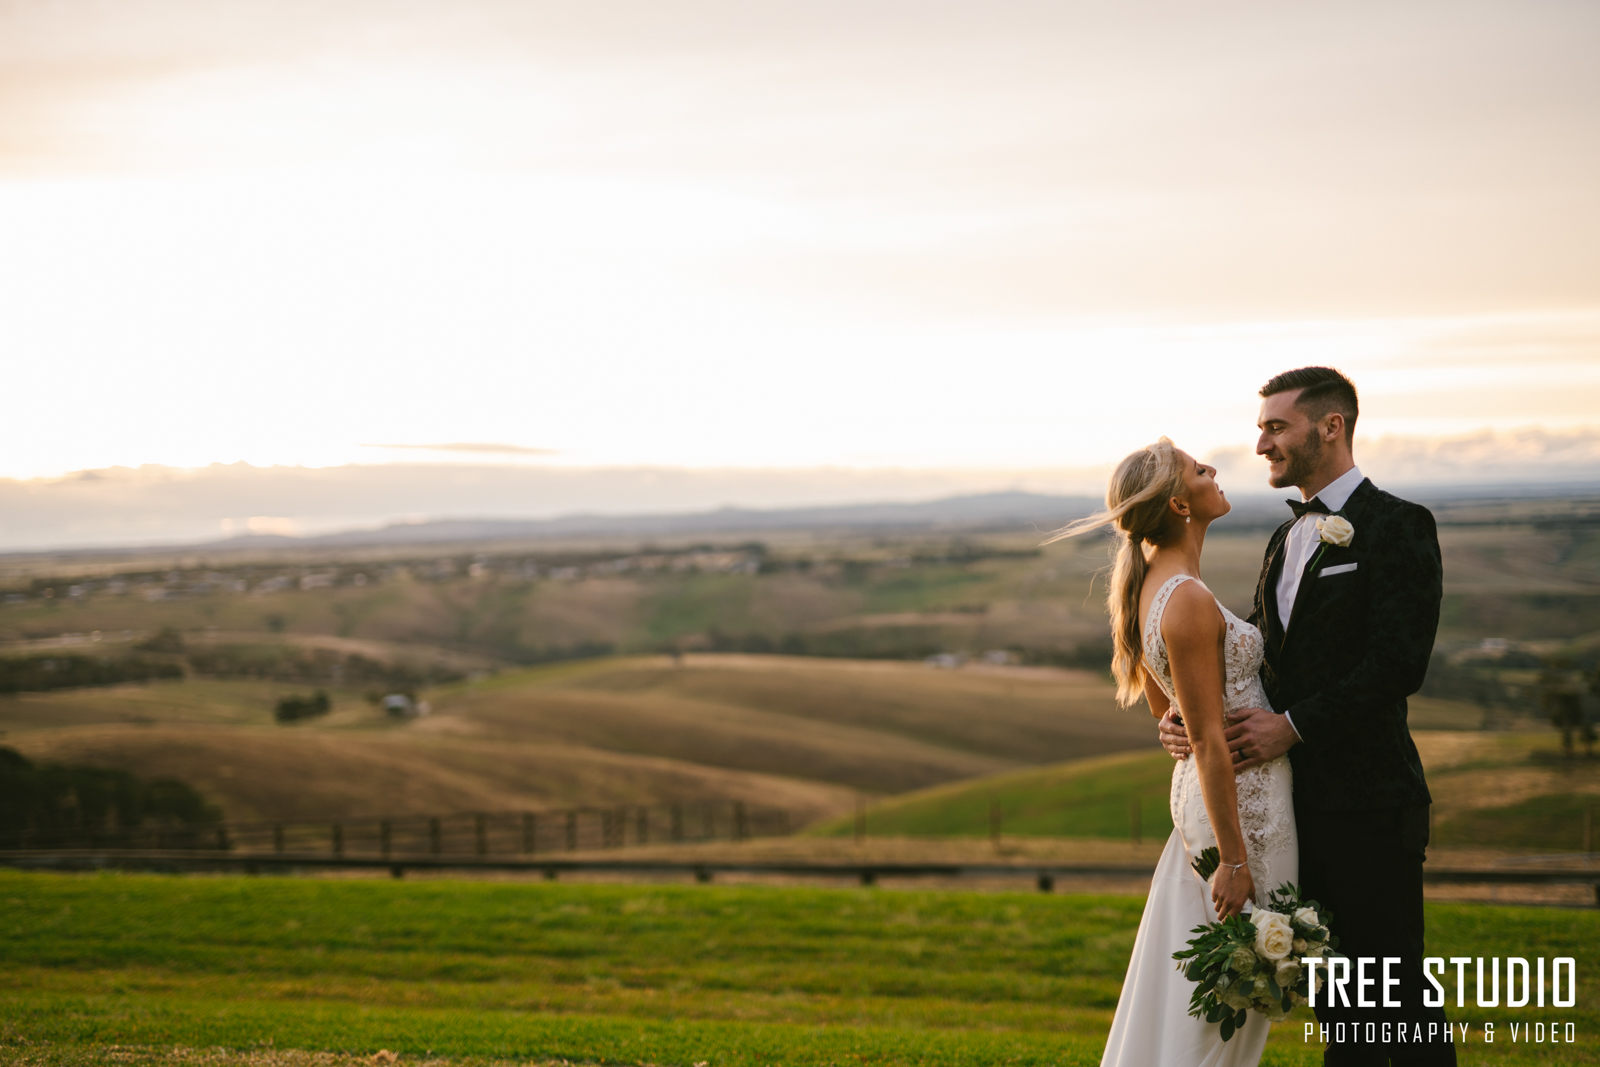
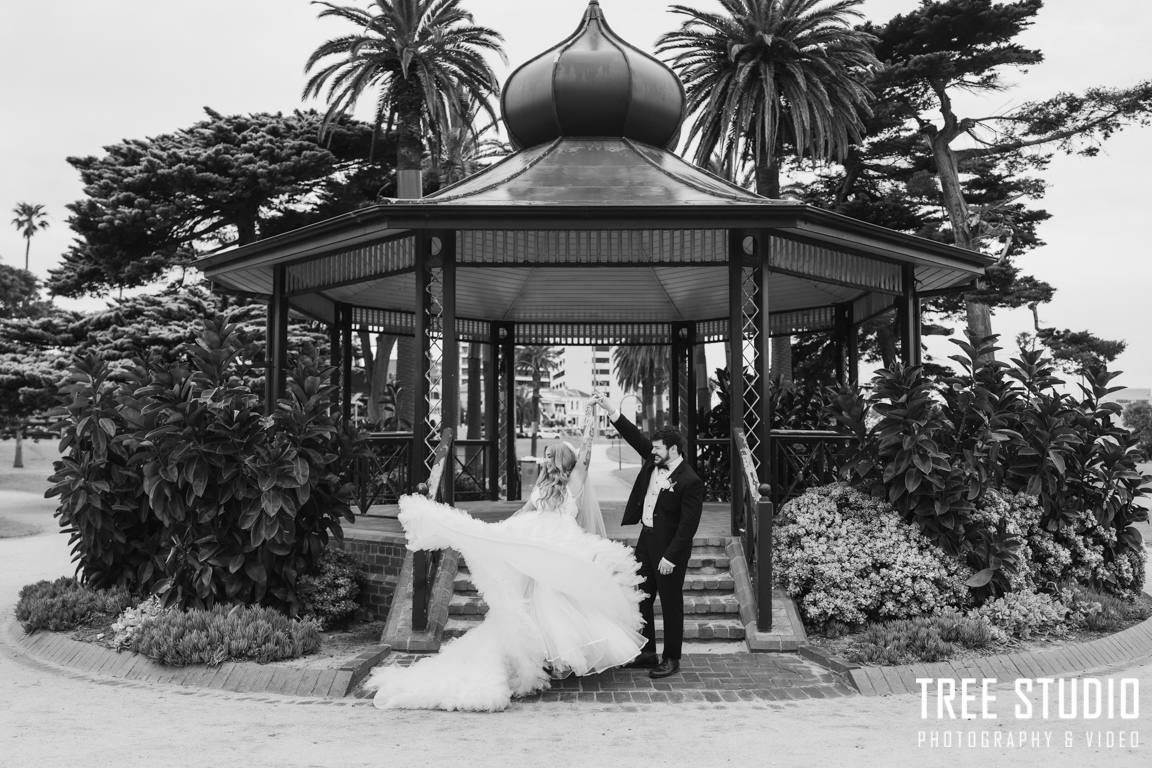
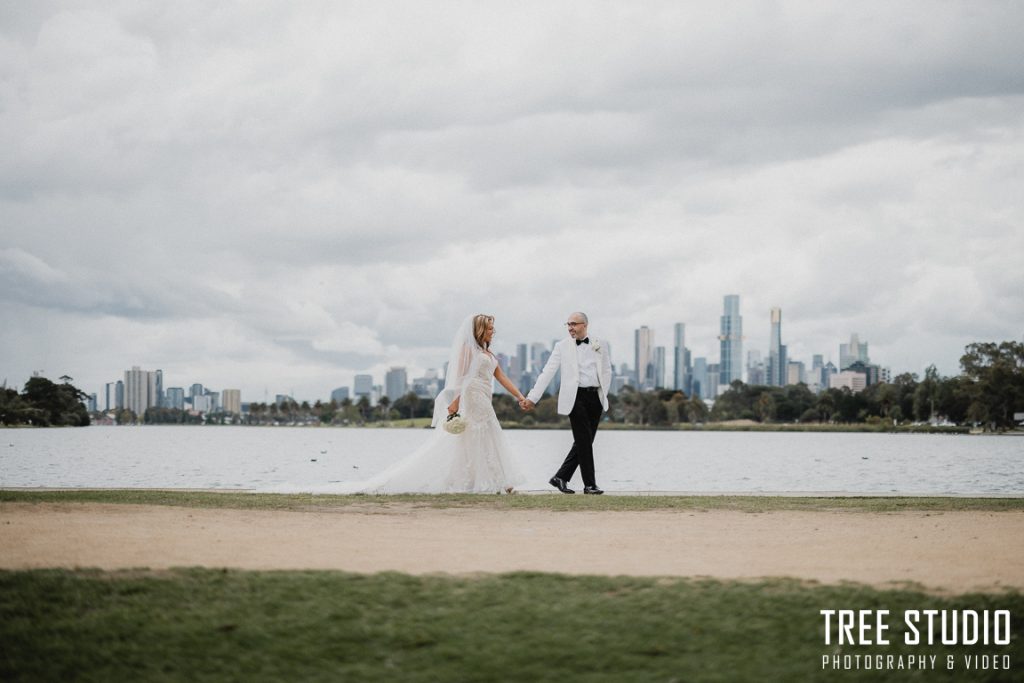
- Top 20 Wedding Photo Locations in Melbourne – Although locations are usually picked by the photographer, as a videographer, you need to know what these places look like and how to shoot there effectively.
- How to Pose for Amazing Wedding Videography – Despite the title, this blog is more about directing couples. In the fast-paced environment of a wedding, you need to give the bride and groom clear, concise, and confident direction. When you do that, they’ll trust you and lean on your professionalism.
That’s all. I call this collection the cornerstone. I’ve attached the links to each blog. I know it may feel overwhelming—each blog is long. But if you don’t have the patience to read through them carefully, you don’t deserve to be an awesome wedding videographer in Melbourne.
Ivan looked at me with a determined gaze and promised,
“I’ll read every single one of them.”
Groom’s Preparation: Dress Code
About a month later, Ivan met me again and said,
“Hi Seth, I’ve read all the blogs you sent me—three times! I’m ready now.”
I smiled and asked,
“Ready to become an awesome wedding videographer in Melbourne?”
Ivan chuckled nervously.
“What’s the next step?” he asked.
I replied,
“You need to experience the real thing. I have a wedding this Saturday. You can come along as my assistant.”
Ivan looked thrilled. Before we parted ways, I reminded him,
“We’re starting at the groom’s house at 9 a.m. for the getting-ready coverage. Meet me in front of the house—and come 15 minutes early. Oh, and dress nicely.”
The First Lesson: Dress Code
That Sunday, I arrived at the groom’s house at 8:40 a.m. Ivan’s car was already parked outside.
“Young man, are you still asleep?” I said, peeking inside and finding him passed out in the driver’s seat.
He quickly woke up. “I came an hour early. I was so worried about being late. I didn’t sleep well—I was too nervous.”
As he jumped out of his car, I instinctively checked his outfit. He was wearing a polo shirt, khaki pants, and—most noticeably—a pair of eye-catching neon sneakers.
The first lesson of the day had nothing to do with cameras. I raised an eyebrow and asked,
“Nice shoes?”
“They’re limited-edition sneakers. Super trendy!” Ivan said with pride.
I smiled but stayed firm.
“The first thing you need to understand is this: our dress code should align with the tone of the wedding. We’re not here to outshine or distract; we’re here to blend in and look professional. You don’t need a tux or a tie, but at least wear smart, semi-formal attire. And sneakers—especially bright ones—are absolutely off the list.”
“But don’t worry,” I continued. “You’re just shadowing today. Watch what I do, and keep quiet when needed.”
Equipment for Filming the Groom Getting Ready
"Hi Ivan, let me see what gear you’re carrying today," I said.
Ivan opened his boot, and there it was—his dazzling collection of gear gathered from Facebook Marketplace, B&H, and digiDirect Melbourne. He opened his camera luggage like a treasure chest, proudly showing off a SIRUI 24mm anamorphic lens. I also spotted a Blackmagic Pocket Cinema Camera, a Sony A7 III, and a whole assortment of lenses—some branded Sony E-mount, some Canon EF, and a few that looked like they might’ve been rescued from the Soviet Union. His setup looked more like a Sunday flea market than a wedding videographer’s toolkit.
I couldn’t help but raise an eyebrow. “Ivan, my friend,” I said, “for a professional Melbourne wedding videographer, our gear should be simple, compact, and practical. I’d really suggest sticking to one camera brand. Mixing Sony and Blackmagic might sound fun, but trust me, their colours don’t play nicely together—it’s a nightmare in post.”
Ivan scratched his head and asked, “So... what exactly should I bring to the groom’s house?”
Well then—time to make him a proper groom prep gear list.
🎥 Videography Setup for Groom’s Getting Ready
Here’s my 2025 gear list for filming the groom getting ready. While technology continues to evolve — with newer, more powerful cameras, lenses, lights, and stabilizers constantly hitting the market — I’ve aimed to create a list that’s as evergreen as possible. If newer tools eventually replace these, I’ll be sure to update this handbook.
To maintain transparency: none of the products mentioned here are sponsored or affiliated with any camera brand or manufacturer. If this guide becomes popular and receives sponsorship in the future, I will clearly mark the sponsored items so you can read with full confidence.
🎥 Basic Wedding Videography Setup: Gear, Pros & Cons, Alternatives
🧰 Basic Gear Setup:
- Two Mirrorless Cameras
- Lenses: 24–70mm f/2.8 Zoom Lens + 24mm Prime Lens
- Support: Monopod or Shoulder Rig
- Gimbal: DJI Ronin 4
- Lighting: Godox LC100R LED RGB Stick (100W) + Barndoors
- Audio: Rode VideoMic NTG
🎬 Camera Body – Mirrorless (vs DSLR)
Mirrorless cameras are now industry standard for wedding videography, offering lightweight bodies, fast autofocus, and advanced features like eye-tracking.
✅ Pros:
- Fast autofocus & eye-detection (essential for moving subjects)
- Lighter than DSLRs — easier for gimbals and long shoots
- Great performance in low light
❌ Cons:
- More expensive than second-hand DSLRs
- Battery life is typically shorter
💡 Budget Alternative:
If you're just starting and on a tight budget, second-hand DSLRs can be a starting point. But:
- They’re heavier (harder to balance on gimbals)
- Lack real-time tracking and modern AF systems
- You’ll spend more time setting focus manually
If using DSLRs with heavy lenses, consider the gimbal's payload and allow extra setup time for proper balance.
📷 Lenses – 24–70mm Zoom + 24mm Prime
Prime Lenses (e.g., 24mm / 35mm / 50mm, f/1.2–f/1.4)
I used to rely on two fast primes (35mm + 50mm) during groom/bride prep.
✅ Pros:
- Wide aperture (f/1.2–1.4): Creamy background blur (bokeh), cinematic look
- Great in low-light environments
- Produces stunning, high-contrast, storytelling visuals
❌ Cons:
- No zoom — you must move physically for framing
- Can miss spontaneous moments when switching lenses
Zoom Lens – 24–70mm f/2.8
Now I mostly use a 24–70mm f/2.8 for flexibility. In my current shooting philosophy, content and emotion outweigh pixel-perfect sharpness.
✅ Pros:
- Covers both wide (24mm) and close-up (70mm) angles
- Fast enough at f/2.8 for most situations
- Great all-rounder, especially if you invest in top-tier models like Sony G Master
❌ Cons:
- Not as sharp or bright as prime lenses
- Slightly heavier
If you're on a budget, Tamron or Sigma 24–70mm lenses are great alternatives.
Camera Support – Monopod vs Shoulder Rig vs Handheld
Monopod
✅ Pros:
- Most stable option for telephoto shots (e.g., 70–200mm)
- Compact version of tripod — great for formal ceremonies or speeches
- Helps reduce fatigue over long shoots
❌ Cons:
- Not agile — adjusting height takes time
- Movement feels more static and less "organic"
- Not ideal for quick-paced reception coverage
Tip: Use a monopod when shooting with heavy setups like long zooms or DSLRs.
Shoulder Rig
In comparison, shoulder rigs offer a more balanced middle ground between stability and movement.
✅ Pros:
- Adds a natural “breathing” motion
- Allows smooth pans/tilts using body movement (bending knees, turning torso)
- Lightweight rigs are perfect for mirrorless setups — no need for full counterweights
I use a compact triangle-style shoulder rig (under $100 on Amazon/eBay). It rests against your chest and gives:
- One-handed operation (your free hand can direct the couple)
- Stability without the bulk of traditional rigs
- Quick setup — ideal for weddings
❌ Cons:
- May still lack the cinematic float of a gimbal
- Slight learning curve to master movement flow
Handheld Grip
To be honest, I rarely shoot fully handheld — presentation matters. Appearing polished in front of the couple is part of your brand.
That said, modern mirrorless cameras with strong in-body image stabilization (IBIS) make handheld viable.
✅ Pros:
- Ultra-fast setup — perfect for fast-moving situations
- Flexible and lightweight with a cage + grip
❌ Cons:
- Requires breathing control and gentle movement
- Big movements can break stabilization
- Can look “unprofessional” if not paired with a cage or rig
Tip: Add a cage + grip for better handling and appearance.
💡 Lighting: Godox LC100R RGB LED Stick (100W) + Barndoors
I used to rely entirely on natural light for bride/groom prep, positioning my subjects by a window and embracing a “less is more” philosophy.
However, once I started using the Godox LC100R, everything changed.
- If window light is too harsh or lacks diffusion (no curtains), the LC100R fills in beautifully.
- It balances the subject and background, making skin tones more flattering.
- The barndoors let you shape the light precisely — from flat fills to directional mood lighting.
- It gives you control over your environment, transforming unpredictable lighting into a controlled, streaming-like setup.
Bonus: Built-in battery lasts up to 2 hours at 30–50% brightness — ideal for prep sessions.
Compared to small LED panels (which are only good for detail shots like rings or watches), the LC100R delivers reliable, full-body lighting.
🎙 Audio: Rode VideoMic NTG
Built-in camera microphones don’t cut it — they’re noisy and lack clarity.
That’s why I use the Rode VideoMic NTG, Rode’s professional-level on-camera microphone.
✅ Key Features:
- Built-in gain control — adjust volume on the mic itself
- USB-C rechargeable — can shoot 2–3 weddings on a single charge
- Auto power detection — turns on/off with your camera
- Safety Track — records a second track at -20dB to avoid clipping
- Built-in high-pass filter — helps clean up ambient noise and emphasize dialogue
At around $435 AUD (2025), it's pricier than entry-level Rode mics, but the sound quality and flexibility are unmatched for wedding work.
It’s not a broadcast mic like the NTG3 or NTG8 (which require phantom power), but for fast-paced weddings, the VideoMic NTG is the most practical and professional option in its class.
When Ivan looked over my wedding videography kit list, he paused briefly and asked, “Is that all we need to bring for groom prep?”
I replied, “Yes, that’s the basic setup. But for larger weddings, or if you have a second videographer with you, or if the client has special requests, you might want to bring additional gear.”
Advanced Equipment
- Lapel mic: Useful when the couple wants clear audio during moments like the groom reading a letter from the bride.
- Drone: Great for capturing outdoor traditions, like Lebanese or Turkish zafar processions to the bride’s house, or aerial shots of the groom leaving.
- Rotating Jewelry Display Stand & Macro Lens: Perfect for professional close-ups of rings, watches, and shoes. However, these shots are time-consuming and best done when you have an assistant or ample time to dedicate.
📌
🎬 Ivan Steps Up — Time to Film for Real
After reading through our wedding videography gear guide, Ivan wasted no time streamlining his setup. Gone were the random vintage lenses and the flashy gadgets. This time, he showed up with just the essentials — compact, practical, and ready for action.
As he slung his gear over his shoulder and walked toward the groom’s house, I stopped him at the gate.
“Ivan, quick question — do you remember what we’re here to film during the groom’s preparation?”
He gave me a confident nod.
“Of course, Seth. Your Complete Wedding Day Guide might focus on photography, but the structure works just as well for videography. We just need to adapt it.”
I raised an eyebrow, impressed.
“Smart boy,” I said. “Alright — walk me through your checklist.”
Without missing a beat, Ivan listed everything he planned to cover:
📋 Ivan’s Groom Prep Videography Checklist
- Groom’s accessories: shoes, suit, cologne, invitation card, rings, watch
- Casual hangouts and laughs with the groomsmen
- A drink shared with the boys — whisky, beer, or espresso
- Groom getting dressed, assisted by his best man
- Close-up shots of the groom putting on his cufflinks and watch
- Groom reading a letter from the bride (if included)
- Solo portraits of the groom (leaning by the window, seated, etc.)
- Groom checking his look in the mirror — full outfit reveal
- Gift exchange between the groom and his groomsmen
- Groom pinning corsages (boutonnières) on his parents
- Family moments and informal portraits
- Any cultural or traditional hosting happening at the groom’s home
- Groom leaving the house and heading out (if the schedule allows)
Ivan asked with a grin, “Can we knock on the groom’s house now?”
I smiled and reassured him, “Sure, let’s rock and roll.”
We rang the bell, and the groom, George, welcomed us with a big smile before introducing us to his groomsmen. He led us into a room where all his accessories were already neatly arranged. His shoes, rings, watch, Prada sunglasses, and cologne were displayed on a sleek black vinyl platform. His tuxedo was placed on a mannequin, with the groomsmen’s suits hanging neatly on the rack beside it.
This was a setup I truly appreciated—everything carefully organized and ready for us. Most of the time, grooms scatter their accessories around the house, and we have to spend 5–10 minutes gathering them before we can start. Sometimes, videographers even need to move furniture to create an ideal shooting space. But George had already done all the hard work for us. Clearly, he was a well-organized groom who saved us valuable time.
The only adjustment I wanted to make was with the lighting. It was 9 o’clock, and the room was still a little dark. I asked, “George, do you mind if I open the curtains just a bit?”
With a friendly smile, he replied, “Do whatever you need to do.”
I told him, “Take a rest for a few minutes—I’ll handle the detail shots.”
At that moment, Ivan passed me the DJI Ronin gimbal stabilizer. Already anticipating my next move, he asked, “Hey Seth, what lens do you want for the accessory shots?”
Since the room was medium-sized, I wanted to start with a wide establishing shot that captured the tux, the platform, and all the accessories. I asked him for the 24mm prime lens, which would give me a clean, high-quality frame for the footage.
I took several wide shots—always shooting multiples to make sure everything stayed steady and in focus. Once those were done, I moved in closer for detailed shots of the watch, rings, and other items.
In the middle of filming, I heard the doorbell again. George opened the door and greeted the guest with genuine enthusiasm that carried all the way into the room.
He brought the guest in and introduced him warmly to everyone: “This is Jake, my wedding photographer—he’s the best in town.”
Jake beamed at the introduction and replied, “Beautiful day, isn’t it? George, can I see the room where you’ve displayed your accessories?”
With a proud smile, George patted Jake on the shoulder and led him into the room where Ivan and I were still capturing the details.
Jake entered with quiet confidence. He was a striking figure—handsome, well-groomed, and undeniably one of the most sought-after wedding photographers in Melbourne. Many couples felt proud to have him at their wedding. Today, he wore a spotless white shirt, mirror-polished shoes, suspenders, and two Canon R6 cameras hanging neatly at his sides.
I walked over to greet him with a handshake, but he brushed past casually, busy setting up his gear. I introduced myself and Ivan. Jake gave us a reluctant “Hi guys,” before his eyes landed on Ivan. He scanned him up and down, then smirked.
“Pretty boy. Nice shoes, huh?”
Ivan understood the undertone but kept quiet. As a young videographer starting out in Melbourne, he had already learned to read between the lines.
Jake glanced at our setup. “You guys done here?”
Since we had enough footage, I replied, “Yes, we’re done.”
Ivan, sensing the tension, was about to head out to film some candid groomsmen moments when Jake’s voice stopped him.
“Don’t ask the groom to get ready yet. Let me shoot the accessories first, then you can go.”
Ivan looked at me. I gestured for him to relax. Standing quietly behind Jake, he watched him at work. I thought it was a good chance—better than any tutorial—for Ivan to learn from another experienced Melbourne wedding photographer.
How Do You Become an Awesome Wedding Videographer in Melbourne?
In 2021, I co-wrote a guide with Mark, a well-known wedding videographer in Melbourne. The article was widely appreciated, but as the industry has evolved, some of the advice has become outdated. With advances in technology, filming techniques, and shifting client expectations, it’s time for a refreshed perspective.
